
Behind the Scenes Video 2014: Jayco Tough Frame
While much of the market sticks with the ‘timber frame, ribbed aluminium cladding’ style of construction, Jayco has developed its unique Tough Frame. The Jayco Tough Frame is a five-layer, vacuum-bonded ‘sandwich’, which comprises a strong, lightweight aluminium frame with polystyrene insulation, internal and external plywood, and finished with a high-gloss fibreglass on the outside.
Jayco recently extended the Tough Frame from walls to include roofs for Silverline caravans, which are now the only Jayco RVs to have a Tough Frame roof. All other RVs, including the Jayco Expanda, have Tough Frame walls and an insulated timber frame roof with a one-piece fibreglass skin.
MAKING THE TOUGH FRAME
Jayco Tough Frame walls are about 25mm thick, while the Silverline roofs are a bit thicker. The process to make each is virtually the same and workers here produce about 18 or 19 walls and nine roofs a day for the caravan line. Lengths of aluminium for the frame are pre-cut into appropriate lengths, laid out into shape and welded together. Ply blocks and high-density polystyrene insulation are added, before a computer-aided laser shows workers where to place pieces of galvanised plating. The gal plates are where the furniture will be screwed into later on the production line. Once the frame is assembled, the Tough Frames are moved into the temperature-controlled lamination room. The temperature in here remains the same year-round and is comfortingly warm in winter and cool in summer.
ASSEMBLING THE FRAME
The lamination room contains two huge vacuum presses, each capable of pressing three Tough Frames at a time.
The Tough Frames are assembled from bottom to top. First, a sheet of hail and dent-resistant, high-gloss fibreglass, which will form the outside finish of the wall, is laid out.
Next, a huge glue gun runs over the fibreglass, applying thin lines of glue, before it’s covered with 3mm plywood boards. More glue goes on, followed by the insulated aluminium frame and, finally, another layer of glue and more ply. This last layer of 3mm coated ply forms the interior surface of the wall – the part you see inside the van.
Even at this early point in the building process, each wall or roof going through lamination has already been assigned an order number for a particular caravan and, therefore, a customer. So individual specifications, such as the colour of the kitchen splashback, need to be known at this point, as they all require different colour pieces of ply.
Workers in the lamination room have just 9.5 minutes from the time the first layer of glue is laid to get the whole piece into the press. The Tough Frame ‘sandwich’ is bonded together by the vacuum press and the process takes about 25 minutes.
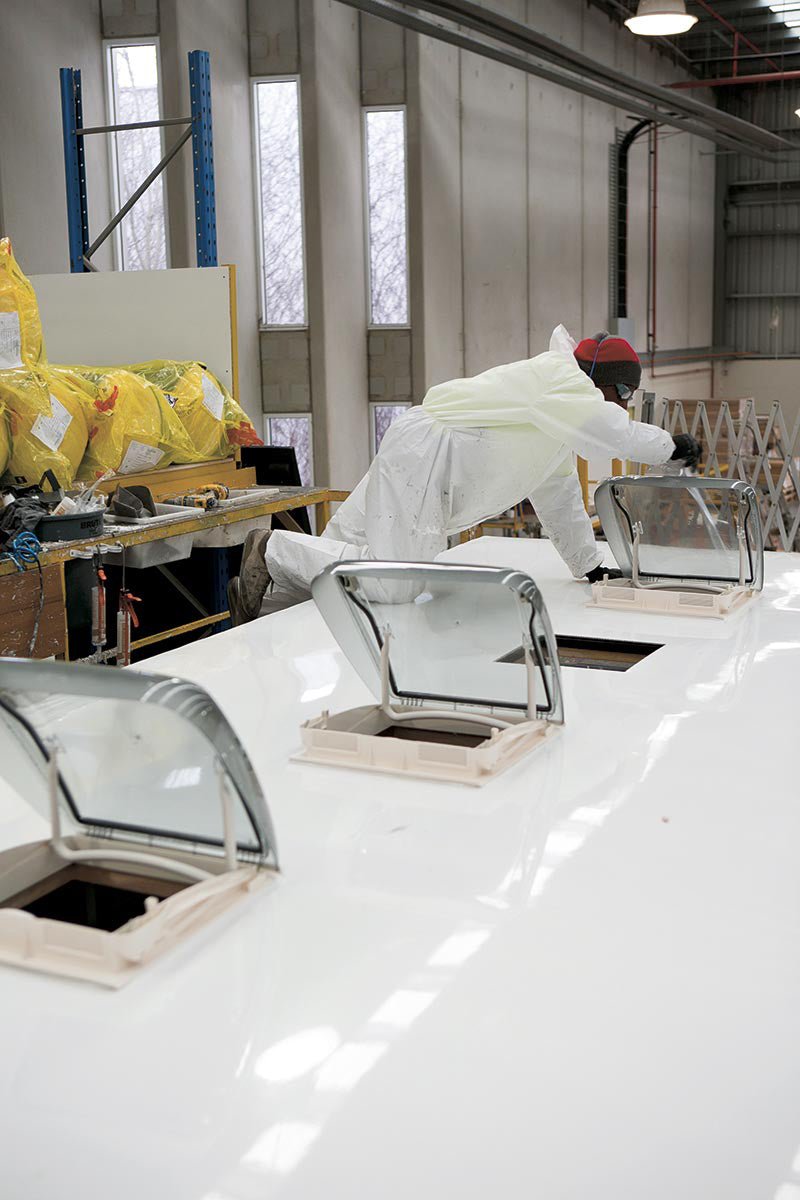
The Tough Frame then rolls out the other side of the press and is lifted by a large suction machine and stacked on a pile, before it’s moved to a routing table. Here, a computer numerical control (CNC) router cuts out all the apertures for the windows, doors, roof hatches, air-conditioner, vents, external bins, and, in the case of the Expanda Outback and other slide-out models, the large offside slide-out.
Workers then use a hand router to trim around the edges of the Tough Frame before stacking it again, ready to be moved onto the production line.
WALLS GO UP
Once on the production line, Jayco’s tinted, Euro-style, push-out windows are fitted to the Tough Frame walls, as well as the protective aluminium checkerplate down the sides of the walls which comes with the Outback pack. The wheels arches are also cut away at this point.
The walls are then ready to be loaded onto the chassis. This is done with the help of an overhead suction system, which helps lift the walls into place. The walls are held in place with clamps and screwed to the chassis.
Further along the line, the Expanda gets its roof. The first step is a timber frame, which is built from scratch on the production line and lifted directly onto the van – all in under 45 minutes. From there, the van is moved further along the line to a gantry, where the final touches to the roof’s construction are made.
This includes lots of electrical wiring for things such as lights, the air-conditioner and solar panel. Following that, fibreglass insulation is laid, covering every inch of the frame, followed by another layer of ply, which is stapled to the frame.
Finally, the one-piece fibreglass skin can be rolled out, glued and stapled down, before a hand-router is used to cut the apertures for the roof hatches and air-conditioner, which are then installed. Later down the line, moulded fibreglass front and rear panels are added to the vans.


